
Woodcarver Ezine
Back Issues
Carvers' Companion Gateway
"How I Adapted a TV Table to Keep
The Wife Happy While Carving in
The Den"
by "Bill Aker" <mawpaw@citlink.net>
Carving in the house can be a big problem, with all those chips on the floor. This can be a real problem if you are over a deep pile rug (they don't really call them shags any more, do they?). And, it's a special dilemma if you have a cat in the house. They don't always recognize that those chips aren't in a box!
All the woodcarvers I know both on the list and off seem to be family oriented people. This means, to me as well as the rest, that carving in a basement nook can be a terribly quiet and somewhat lonesome time. Therefore, to solve my problem, and get back into the family circle, I began to look for someway to keep the debris down to acceptable levels.
I ran the gamut from aprons to sheets on the floor; a board on the lap to sitting on the floor, so the pile would be tinier and could be swept up with one hit from the vacuum nozzle.
There was also the problem of indoor craft and woodcarving shows. Some of these people don't like carvers even if they cleaned up after themselves, because of the chips seeming to get into the line of travel from booth to booth during the shows.
This called for portability as well as the ability to catch chips. And, the proper solution could include the consolidation of other elements, such as sharpening stones, lighting, etc.
One evening, as we do now and then, my wife and I were in the den watching TV and eating off a pair of wooden, collapsible TV tables. The light suddenly dawned. A TV table could be brought close enough to the body so nothing would slip off onto the floor.
Clearing dinner off the table, I tried that. Chips on the floor, of course. So, in her wisdom of all things, my wife says, very matter of factly, "You need a hole in it."
My first reaction was to retort, "Why, so the chips can get to the floor faster?" But, Momma might have raised dumb kids, but none of us are crazy; so after a moment I said, "Of course with a bag under it to catch the chips!" Invention is a cooperative thing in this household.
So I cut a hole in the upper center of the table, 3 inches from the top edge. I chose the top edge to be the one that the stationary set of legs was attached. This was so that the set with the lower strut would be on the opposite side of where my feet would go, allowing the table to be pulled as close to the body as possible.
The hole is 5 1/2 inches wide. This was determined because the first receptacle I installed was a plastic bowl which was about 7 inches wide with two 1/4 inch flanges on each side. I attached the bowl with two blocks of wood screwed to the underside of the table top. These blocks snapped over the bowl's flanges holding it under the hole.
Since then, I have tried several receptacles, all of which have their up and down sides. The one I have hit on to be the lightest and most easy to work with is a cloth clothes pin bag, bought at Wal-Mart for a paltry $2.49. It has a strong wire rim inside the top of the fabric which is attached to a wire hook. The firm rim allows the bag to hang open on the clothesline. After taking the hook off the bag, the rim allowed the two blocks, on the underside of the table, to slip easily into place, firmly securing the bag.
Before, I had screwed a wooden ring under the hole and attached a plastic bag with an O-ring. One I made for another carver, I used a vacuum cleaner belt. All these systems work well, it's more or less my preference for the clothes pin bag.
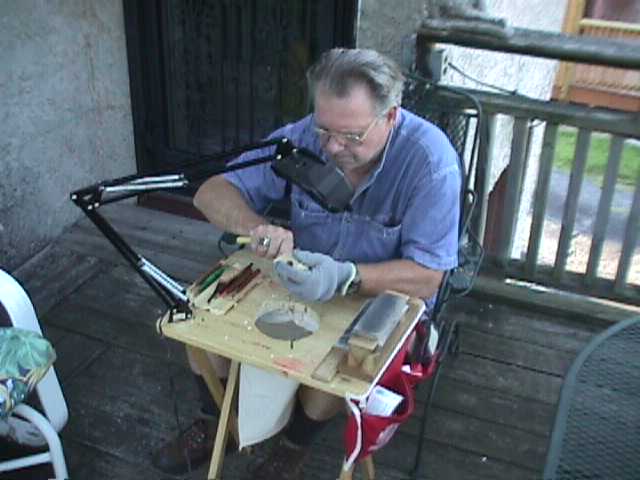
In Photo #1: I'm sitting at the table which I moved to the deck to take advantage of the soft evening outdoor light for more photographic detail. The goose neck lamp is also a magnifier. I'm doing a cane segment so I need all the help I can get in the eyesight department.
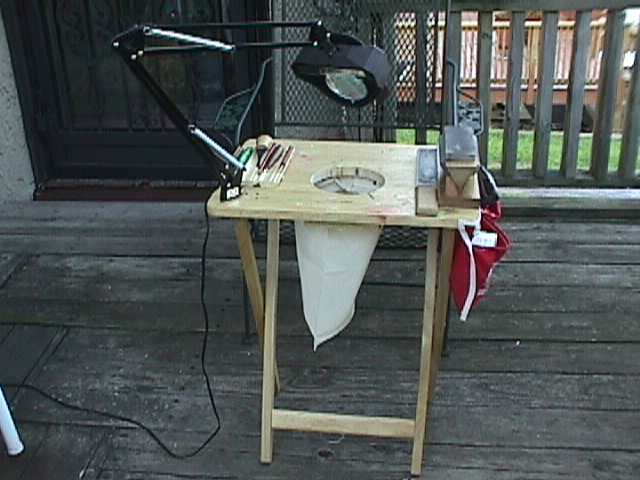
Photo #2: Front on view showing the placement of the tri-stones, my pigskin strop, and the knife tray. The attachment on the side is a carpenter's apron, with two pockets, real handy for keeping odds and ends nearby.
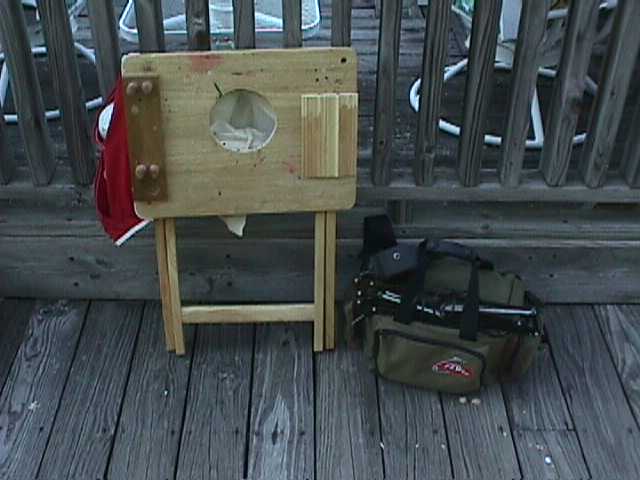
Photo #3: Packed and ready to go. The lamp folds into a small package and is easily carried in the top strap of my soft pack. All the other pieces are within the soft pack along with my knives and other paraphernalia. This is real easy to pack into a library or school for a demo. Sets up in about fifteen minutes.
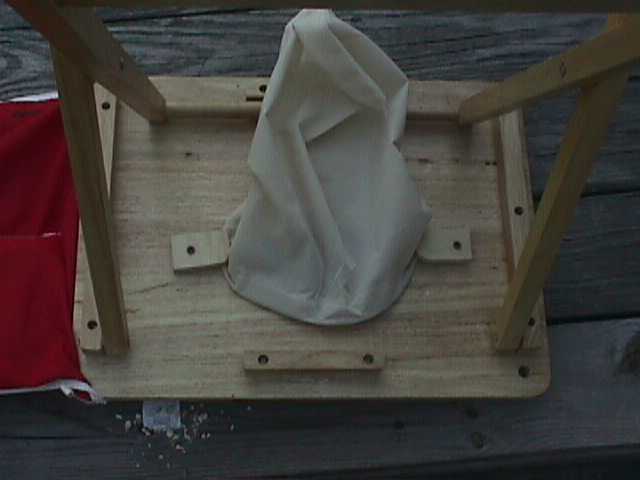
Photo #4: The underside showing a detail of how the blocks attach the bag under the hole.
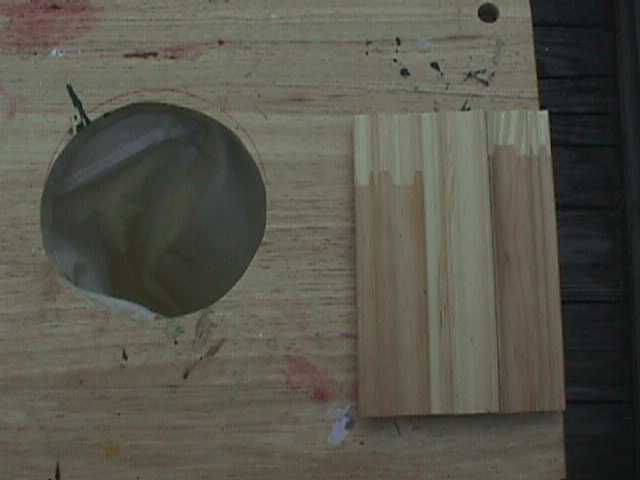
Photo #5: Detail of the knife tray. This is three sections of 1 1/2 inch ogee crown molding. This particular molding provides grooves sized for thin handled knives to thick handled knives, as well as a groove ideally suited for a pencil.
I hope this information comes in handy, especially if it keeps peace in the family. If anybody needs any more information, be sure and contact me.
Bill Aker